DIY Shower Conversion: Tiling a Shower Surround Guide
Recently, WJLA highlighted insights from Metropolitan Bath and Tile on approaching a shower conversion, emphasizing the importance of doing it the "right way." For many DIY enthusiasts, a key part of this transformative project is the shower tile installation, which can significantly impact both the aesthetics and longevity of your new shower space.
This guide provides a comprehensive overview of the tiling aspects involved in a DIY shower conversion, focusing on accurate material estimation, strategic layout planning, and best practices to ensure a professional-looking and durable finish. Get ready to turn your vision into a tiled reality.
Planning Your Shower Tile Installation
A successful DIY shower conversion begins long before the first tile is mixed with thinset. Careful planning and preparation are paramount, especially when it comes to measuring your space and selecting the right materials. Your first step should involve thoroughly measuring all surfaces that will be tiled: the shower walls, floor, and any niches or benches. Understanding these dimensions is crucial for accurate material orders.
Beyond measurements, consider the type of tile you'll use. For shower environments, water absorption matters: porcelain is impervious (rated at 0.5% or less absorption under ANSI A137.1), which makes it the preferred choice for constant-moisture areas. Standard ceramic is more absorbent, so only use ceramic that is specifically rated vitreous or semi-vitreous for wet applications, and avoid non-vitreous wall tile in showers. Natural stone can also be used, but often requires specific sealants and more diligent maintenance. Equally critical is ensuring your shower substrate is properly prepared and waterproofed, adhering to industry standards to prevent water damage behind the tile. This foundational work is essential for the longevity of your shower, as highlighted by resources like the Tile Council of North America (TCNA).
Accurate Material Estimation for Shower Tiling
Estimating materials precisely is key to avoiding costly delays or overspending. Start by calculating the total square footage of your shower walls and floor. Don't forget to account for any recessed niches, benches, or ceiling areas if you're tiling them. It's wise to add a waste factor, typically 10-15%, to your tile quantity to cover cuts, breakage, and future repairs. Our how much tile do I need guide can provide more detailed insights on this.
Beyond the tiles themselves, you'll need to estimate thinset mortar and grout. Thinset requirements vary based on the tile size, substrate, and trowel size, while grout depends on tile size and grout line width. Fortunately, tools like our free tile calculator can simplify these complex calculations, providing estimates for tile, thinset, and grout. For a more detailed breakdown, refer to our how to estimate grout and thinset guide and our Bathroom Tile Estimating Checklist.
Shower Tile Layout Strategies
Before you mix any thinset, planning your tile layout is a critical step in achieving a professional-looking shower tile installation. Begin with a dry layout on the floor or a large flat surface to visualize the pattern and make any necessary adjustments. The goal is to minimize awkward cuts and ensure a balanced appearance, especially around prominent features like the showerhead, faucet, and any niches.
A common strategy is to start your layout from the most visible wall, often the back wall opposite the door, and work your way out. Centering tiles on walls or key features can create a more symmetrical and appealing finish, helping to avoid thin "sliver" cuts at the edges. For shower floors, ensuring proper slope towards the drain is paramount, which may influence your tile choice and layout, especially with larger format tiles. Careful planning here helps ensure both beauty and functionality.
Essential Steps for a Lasting Shower Tile Installation
With planning and materials in place, the physical installation requires precision. The sequence generally involves:
- Surface Preparation: Ensure all surfaces are clean, dry, level, and properly waterproofed according to manufacturer specifications and building codes. This is a non-negotiable step for a durable shower.
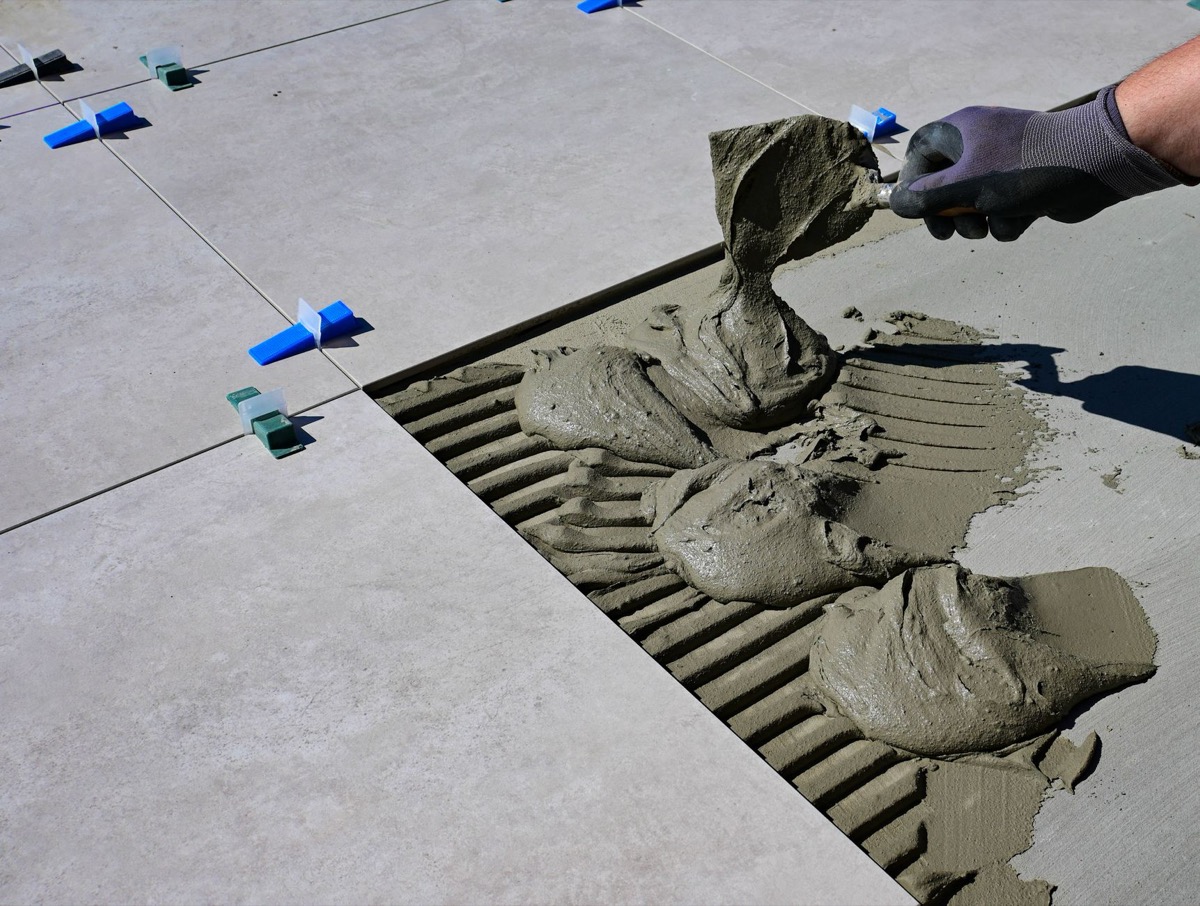
- Thinset Application: Use the correct type and size of notched trowel for your specific tile and substrate. Apply thinset evenly, covering enough area for a few tiles at a time to prevent it from skinning over.
- Tile Setting: Press each tile firmly into the thinset, using spacers to maintain consistent grout lines. Regularly check for level and plumb with a level.
- Grouting: Once the thinset has fully cured (check manufacturer's recommendations), apply grout evenly across the tile surface with a rubber float, forcing it into all joints. Clean excess grout with a damp sponge.
- Sealing: For porous tiles and grout, apply a sealant after the grout has cured to protect against moisture and staining.
Following these steps diligently, supported by reliable calculations from our free tile calculator, will help ensure a shower that is both beautiful and built to last.
Tiles needed to cover 100 sq ft by tile size
Key Takeaways
- Accurate measurements are fundamental for successful shower tile installation.
- Always account for a 10-15% waste factor when estimating tile and materials.
- A dry tile layout helps visualize and correct patterns before setting.
- Proper waterproofing of the shower substrate is crucial for longevity and preventing water damage.
- Utilize online calculators to streamline complex material estimation for tile, thinset, and grout.
Try It Yourself — Free
Ready to start your shower conversion? Leverage our free tile calculator to accurately estimate your material needs, including tile, thinset, and grout. For a comprehensive guide to planning your bathroom project, explore our Bathroom Tile Estimating Checklist.
Related Resources
- Bathroom Tile Estimating Checklist
- Flooring Calculator
- Flooring Calculators Hub
- Hardwood Flooring Calculator
- Complete Guide
More From Our Network
- Duct Size Calculator — same niche
- cyberfrad — our network
Sources
- WJLA — Original report
- Tile Council of North America (TCNA) — ...ensuring your shower substrate is properly prepared and waterproofed, adhering to industry standards to prevent water damage behind the tile. This foundational work is essential for the longevity of your shower, as highlighted by resources like the Tile Council of North America (TCNA).